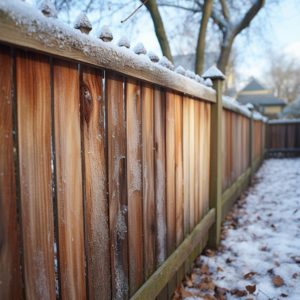
As a wood restoration expert, I have seen many homeowners struggle with maintaining their fences. Staining a fence is an essential part of fence maintenance that helps protect the wood from weather damage and decay. In this blog post, I will provide a step-by-step guide on how to stain a fence and some tips for achieving the best results.
How To Prepare A Fence For Stain
Step 1: Clean the Fence – Before you can start staining your fence, you need to ensure it is clean. Dirt, mildew, and other contaminants can prevent the stain from adhering properly to the wood. To clean your fence, you will want to use a wood cleaner, and a brightener. These can be applied with a standard pump up garden sprayer or a back pack sprayer. Once you are done, you will want to rinse the fence with a garden hose spray attachment or a pressure washer. If you use a pressure washer, use low pressure – 1000 psi or less – to ensure you are not damaging the wood and leaving marks in the wood.
Step 2: Make any repairs to the fence that are necessary. Replace any broken pickets with new ones and ensure all hinges and gate latches are in working order. The new pickets will not need to be cleaned or brightened.
Step 3: Apply the Stain – Before you apply the stain, it’s important to choose the right type of stain for your fence. There are three main types of stain: Oil based penetrating, Acrylic Based Surface Stain, Latex based solid stains. We always recommend using an oil based penetrating stain like Wood Defender, Ready Seal, Expert Stain and Seal to name a few. These stains will never peel, or flake and are the easiest to apply and maintain. All of these stains come in clear, semi-transparent, semi-solid and solid. Clear and transparent stain allows the natural beauty of the wood to show through but doesn’t offer as much UV protection. Semi-transparent stain adds color and some UV protection while still allowing the grain of the wood to show through. Solid stain covers the wood completely and offers the most UV protection, but it also hides the natural grain of the wood. Solid Stains, if they are latex or acrylic based are the most likely to peel or flake over time and can be the most difficult to maintain.
How To Apply Fence Stain
Once you’ve chosen the type of stain you want, you can start applying it to the fence. You can use a brush, roller, or sprayer, depending on your preference. If you’re using a brush, start at the top of the fence and work your way down, brushing with the grain of the wood. If you’re using a roller, use long, even strokes to apply the stain. If you’re using a sprayer, be sure to wear protective gear and follow the manufacturer’s instructions for use. Depending on the brand of the stain, using a sprayer may require back brushing, so be mindful to follow the manufacturers recommendation.

Apply the stain in thin coats, and be sure to work it into the wood. Avoid applying too much stain at once, as this can lead to drips and uneven coverage. Be sure to stain both sides of the fence, and don’t forget about the posts and any other wooden components.
Step 4: Let the Stain Dry After you’ve applied the stain, you need to let it dry completely before using the fence. The drying time will vary depending on the type of stain you’re using and the weather conditions, but most stains take between 24 and 48 hours to dry completely. Be sure to check the manufacturer’s instructions for specific drying times.
Step 5: Apply a Second Coat (Optional) If you want a deeper color or more protection, you can apply a second coat of stain after the first coat has dried. Follow the same application process as before, and be sure to let the second coat dry completely before using the fence.
Tips On How To Stain A Fence
- Check the weather forecast before staining your fence. Avoid staining on days with high humidity, rain, or extreme heat.
- Wear protective clothing, gloves, and eyewear when staining to protect yourself from the stain and fumes.
- Use a drop cloth or tarp to protect your plants and other outdoor items from the stain.
- Don’t stain your fence in direct sunlight, as this can cause the stain to dry too quickly and lead to uneven coverage.
- Be sure to stir the stain thoroughly before using it to ensure even color
- If you have a large fence, consider breaking it up into sections and staining one section at a time to avoid getting overwhelmed.
- Take your time and don’t rush the staining process. Rushing can lead to mistakes and uneven coverage.
If you’re using a sprayer, be sure to cover nearby surfaces with plastic or drop cloths to avoid overspray. - If you’re using a roller, be sure to use a high-quality roller cover to avoid leaving fibers behind in the stain.
- When applying the stain, be sure to pay extra attention to the end grain of the wood, as it can absorb more stain than the rest of the wood.
In conclusion, staining a fence is a crucial part of fence maintenance that can help protect the wood from damage and decay. By following the steps outlined above and using the tips provided, you can achieve a beautiful, long-lasting finish on your fence. Remember to choose the right type of stain for your fence, prepare the surface properly, and take your time during the application process. By doing so, you can ensure that your fence looks great and stays protected for years to come.


